Tactical Combat System
Grid-based strategic warfare featuring procedurally generated terrain, three-deck card mechanics, dynamic deployment zones, and variable unit formations across an immersive 20×20 battlefield matrix.
Try the Combat Simulator
Experience the tactical grid system with an interactive AI battle demo
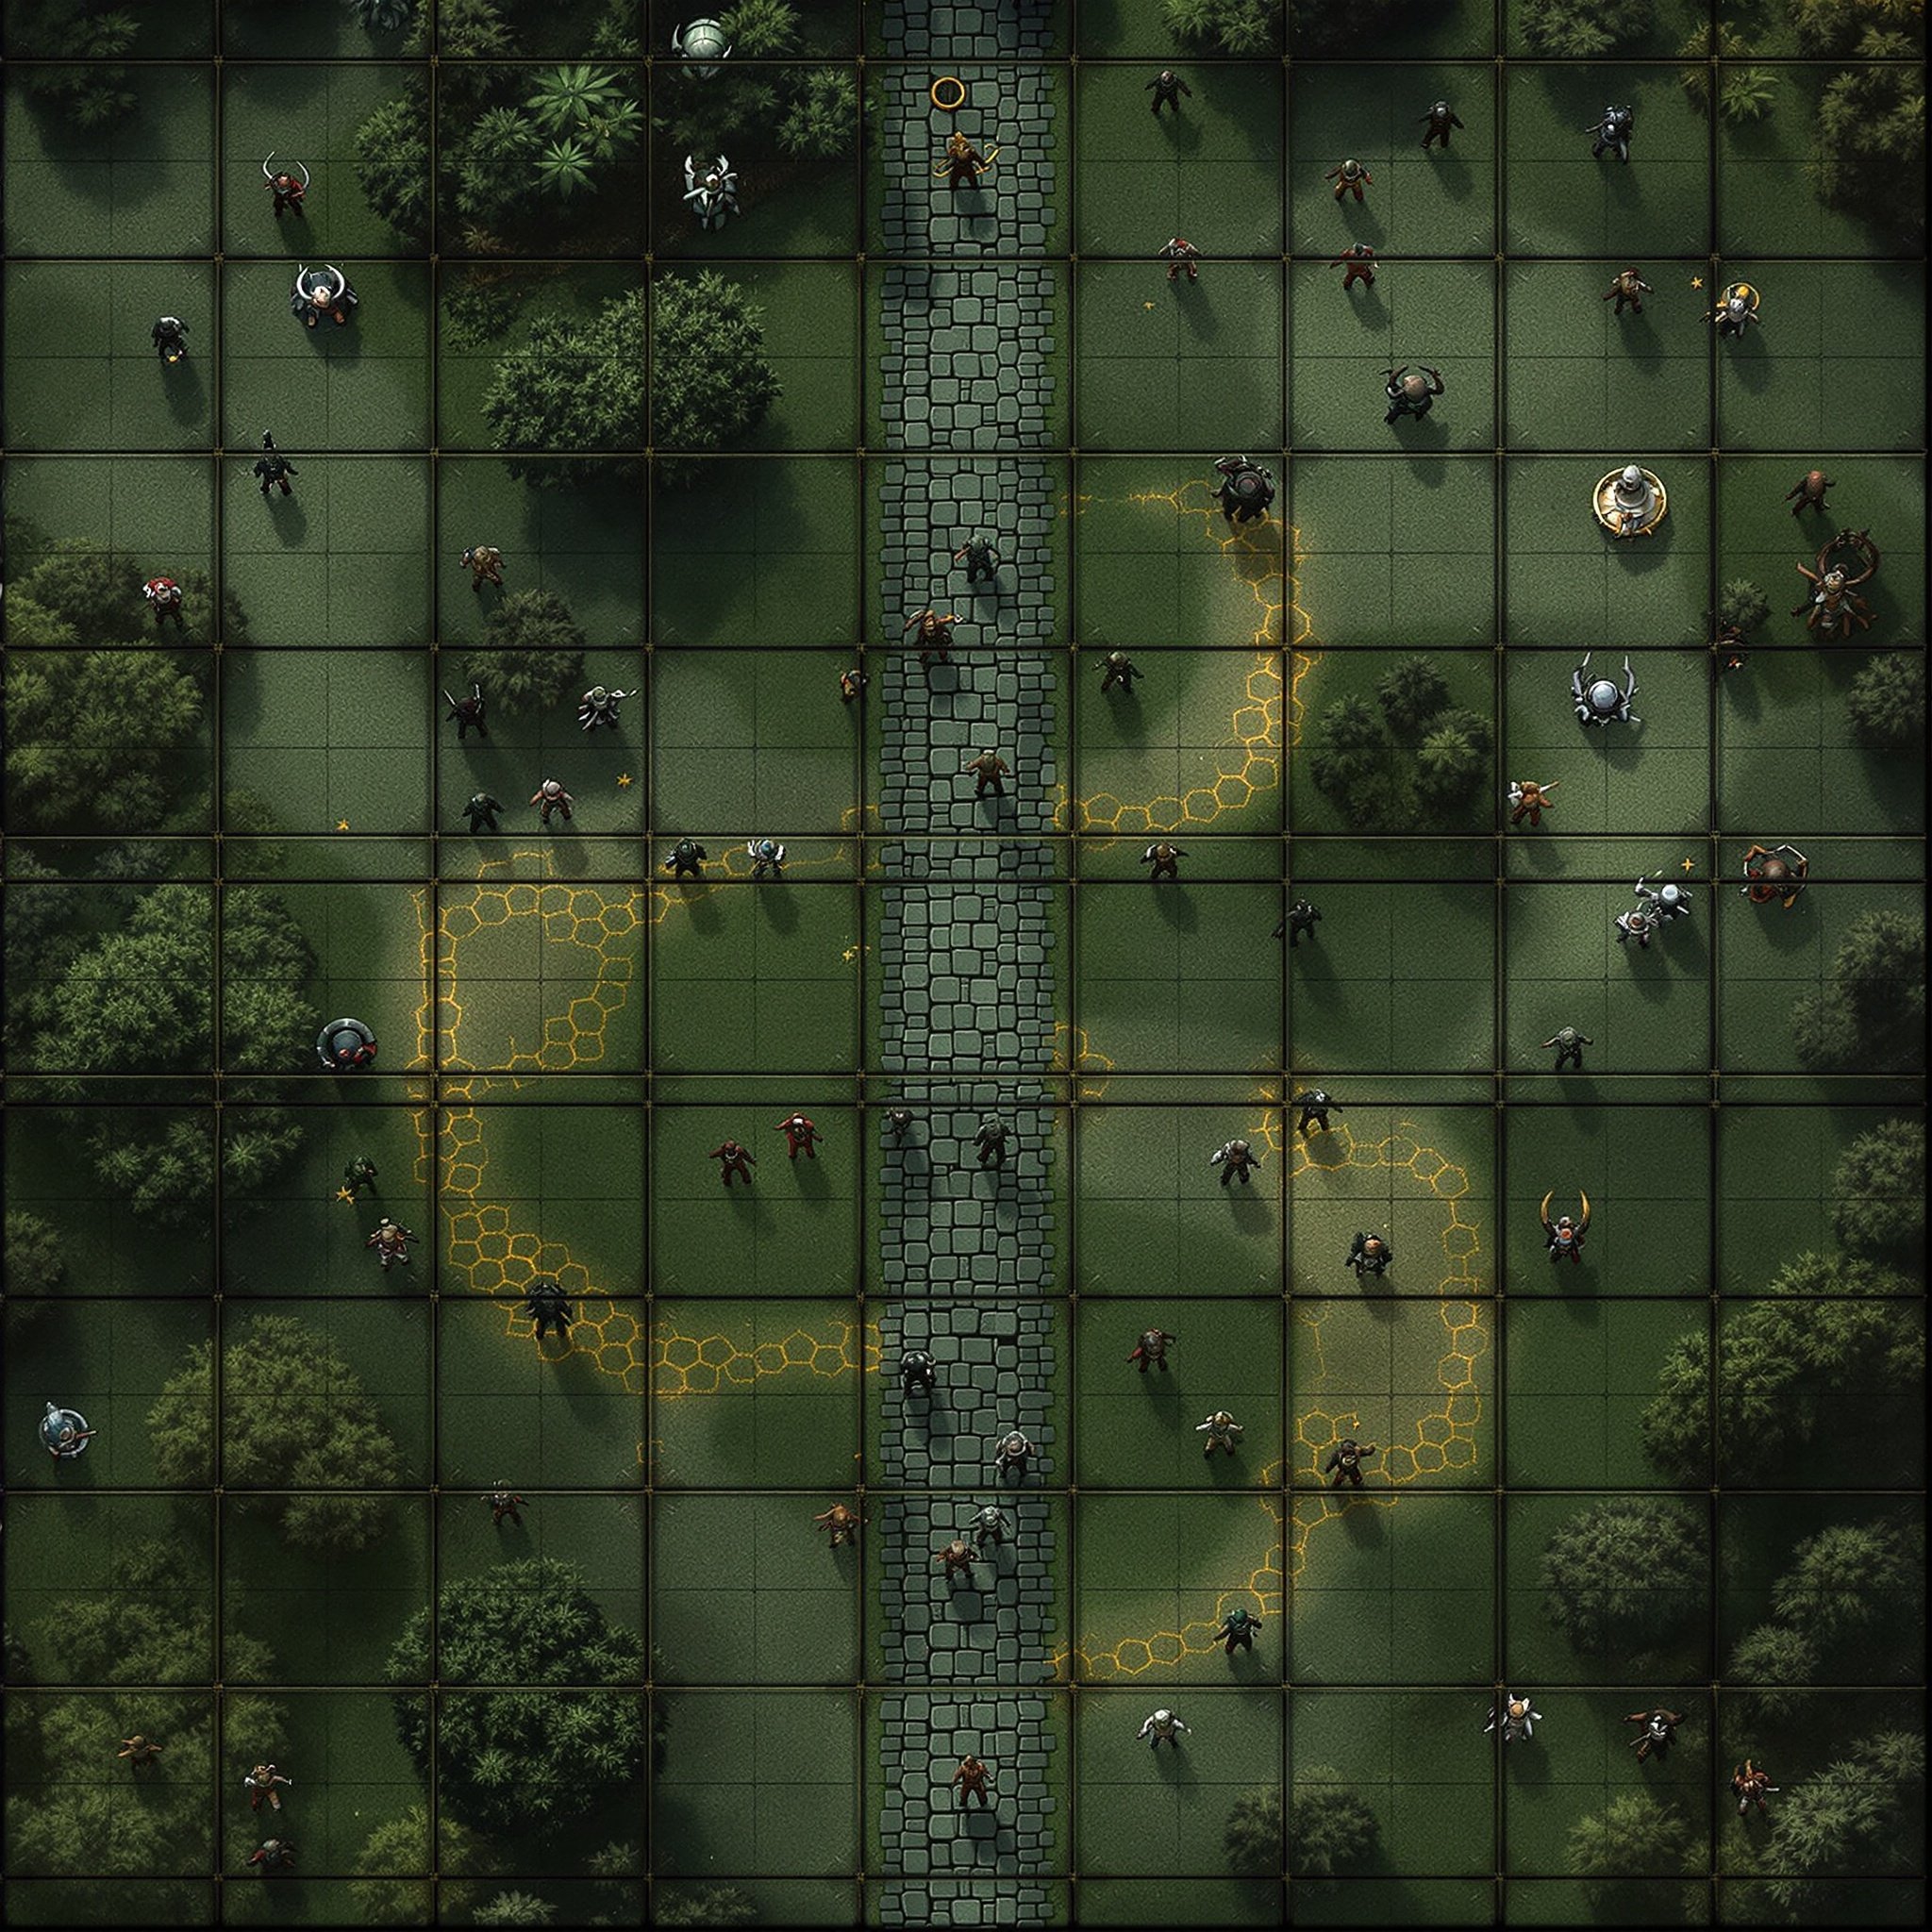
Battlefield Layout
The 20×20 combat grid is divided into three distinct zones. Each player controls a deployment zone where they position their forces before battle commences.
Grid Zone Distribution
Columns 1-5
100 Tiles
Columns 6-16
220 Tiles
Columns 17-20
80 Tiles
Deployment Zone Rules
Before combat begins, each player places their units within their designated deployment zone. The grid coordinates use columns 1-20 (horizontal) and rows A-T (vertical).
Player Zone (Yellow)
Columns 1-5, free placement of your forces before battle.
Enemy Zone (Orange)
Columns 17-20, opponent's deployment area mirrored on opposite side.
Terrain in Deployment Zones
Terrain can spawn in your zone. If blocked, wait one turn before placing.
Procedural Terrain Generation
Each battlefield is uniquely generated with randomized terrain features. The danger level determines what percentage of the grid contains hazardous or strategic terrain tiles.
Safe Battlefield
Minimal terrain obstacles. Open field combat favoring direct engagement strategies.
~40 terrain tiles
Moderate Terrain
Balanced mix of obstacles creating tactical chokepoints and flanking opportunities.
~120 terrain tiles
Dangerous Territory
Heavy terrain coverage creating labyrinthine paths. Favors specialized unit compositions.
~200 terrain tiles
Terrain Movement Matrix
| Terrain | Standard | Flying | Giants/Dragons | Special Effect |
|---|---|---|---|---|
Mountains | ❌ Blocked | +1 Step | +2 Steps | Impassable for most units |
Trenches | ❌ Blocked | +1 Step | ❌ Blocked | +20% ranged damage to units crossing |
Forest | +1 Step | Free | ❌ Blocked | Cover bonus for Elves, reduces ranged damage |
Water | ❌ Blocked | Free | ❌ Blocked | Only aquatic units can traverse |
Swamp | +2 Steps | Free | +1 Step | Poison damage over time |
Holy Ground | Normal | Normal | Normal | +Buff Angels/Holy, -Debuff Undead/Demons |
Cursed Ground | Normal | Normal | Normal | +Buff Undead/Demons, -Debuff Angels/Holy |
Lava | ❌ (Damage) | +1 Step | +1 Step | Only fire-resistant units immune to damage |
Three-Deck Card System
Combat utilizes three specialized card decks. Each deck serves a distinct tactical purpose, and mastering their synergies is key to battlefield dominance.
Combat Deck
Commanders and soldier units for frontline deployment
Hazard Deck
Traps and negative effects to hinder enemy forces
Support Deck
Defensive structures and beneficial enchantments
Battle Phase Progression
Combat unfolds in two distinct phases: pre-battle setup and active engagement.
Setup Phase
Pre-battle preparation
Initial Draw
Draw 3 cards from each deck (9 cards total) for initial deployment.
Free Placement
Place units, traps, and structures anywhere within your deployment zone (Columns 1-5).
Ready Confirmation
Press "Ready" when placement is complete. Battle begins when both players confirm.
40-Second Timer
Auto-start triggers if opponent doesn't ready within time limit.
Battle Phase
Active combat engagement
Card Draw Limit
Maximum 10 additional draws during the entire battle. Draw once every 4 combat rounds.
Draw Mechanics
Each draw yields one card from each deck (if available). Empty decks yield nothing.
Deck Conversion (2:1)
When a deck is depleted, convert 2 empty deck draws into 1 Combat Deck draw. Trade flexibility for reinforcements.
Deck Conversion Example
Player has used 6 draws
4 remaining draws available
Hazard & Support decks depleted
Only Combat deck has cards
4 draws × 2 empty decks = 8 lost draws
Converts to +4 Combat draws (8÷2)
Unit Stack System
Units operate in stacks, allowing strategic distribution of forces across the battlefield. A stack of 50 archers can be split into 5 groups of 10 for tactical flexibility.
Stack Mechanics
Flexible Distribution
Split 50 archers into 5 stacks of 10, or keep them as one powerful group.
Stack Health
Damage is distributed across the stack. Losing units reduces stack power.
Combined Attacks
Entire stacks attack together, multiplying damage based on remaining units.
Variable Unit Sizes
Different units occupy different amounts of grid space, requiring careful placement strategy.
Standard Infantry
1x1Core unit class: Archers, Swordsmen, Spearmen
Drake
1x3Large-scale draconic unit with horizontal tile occupation
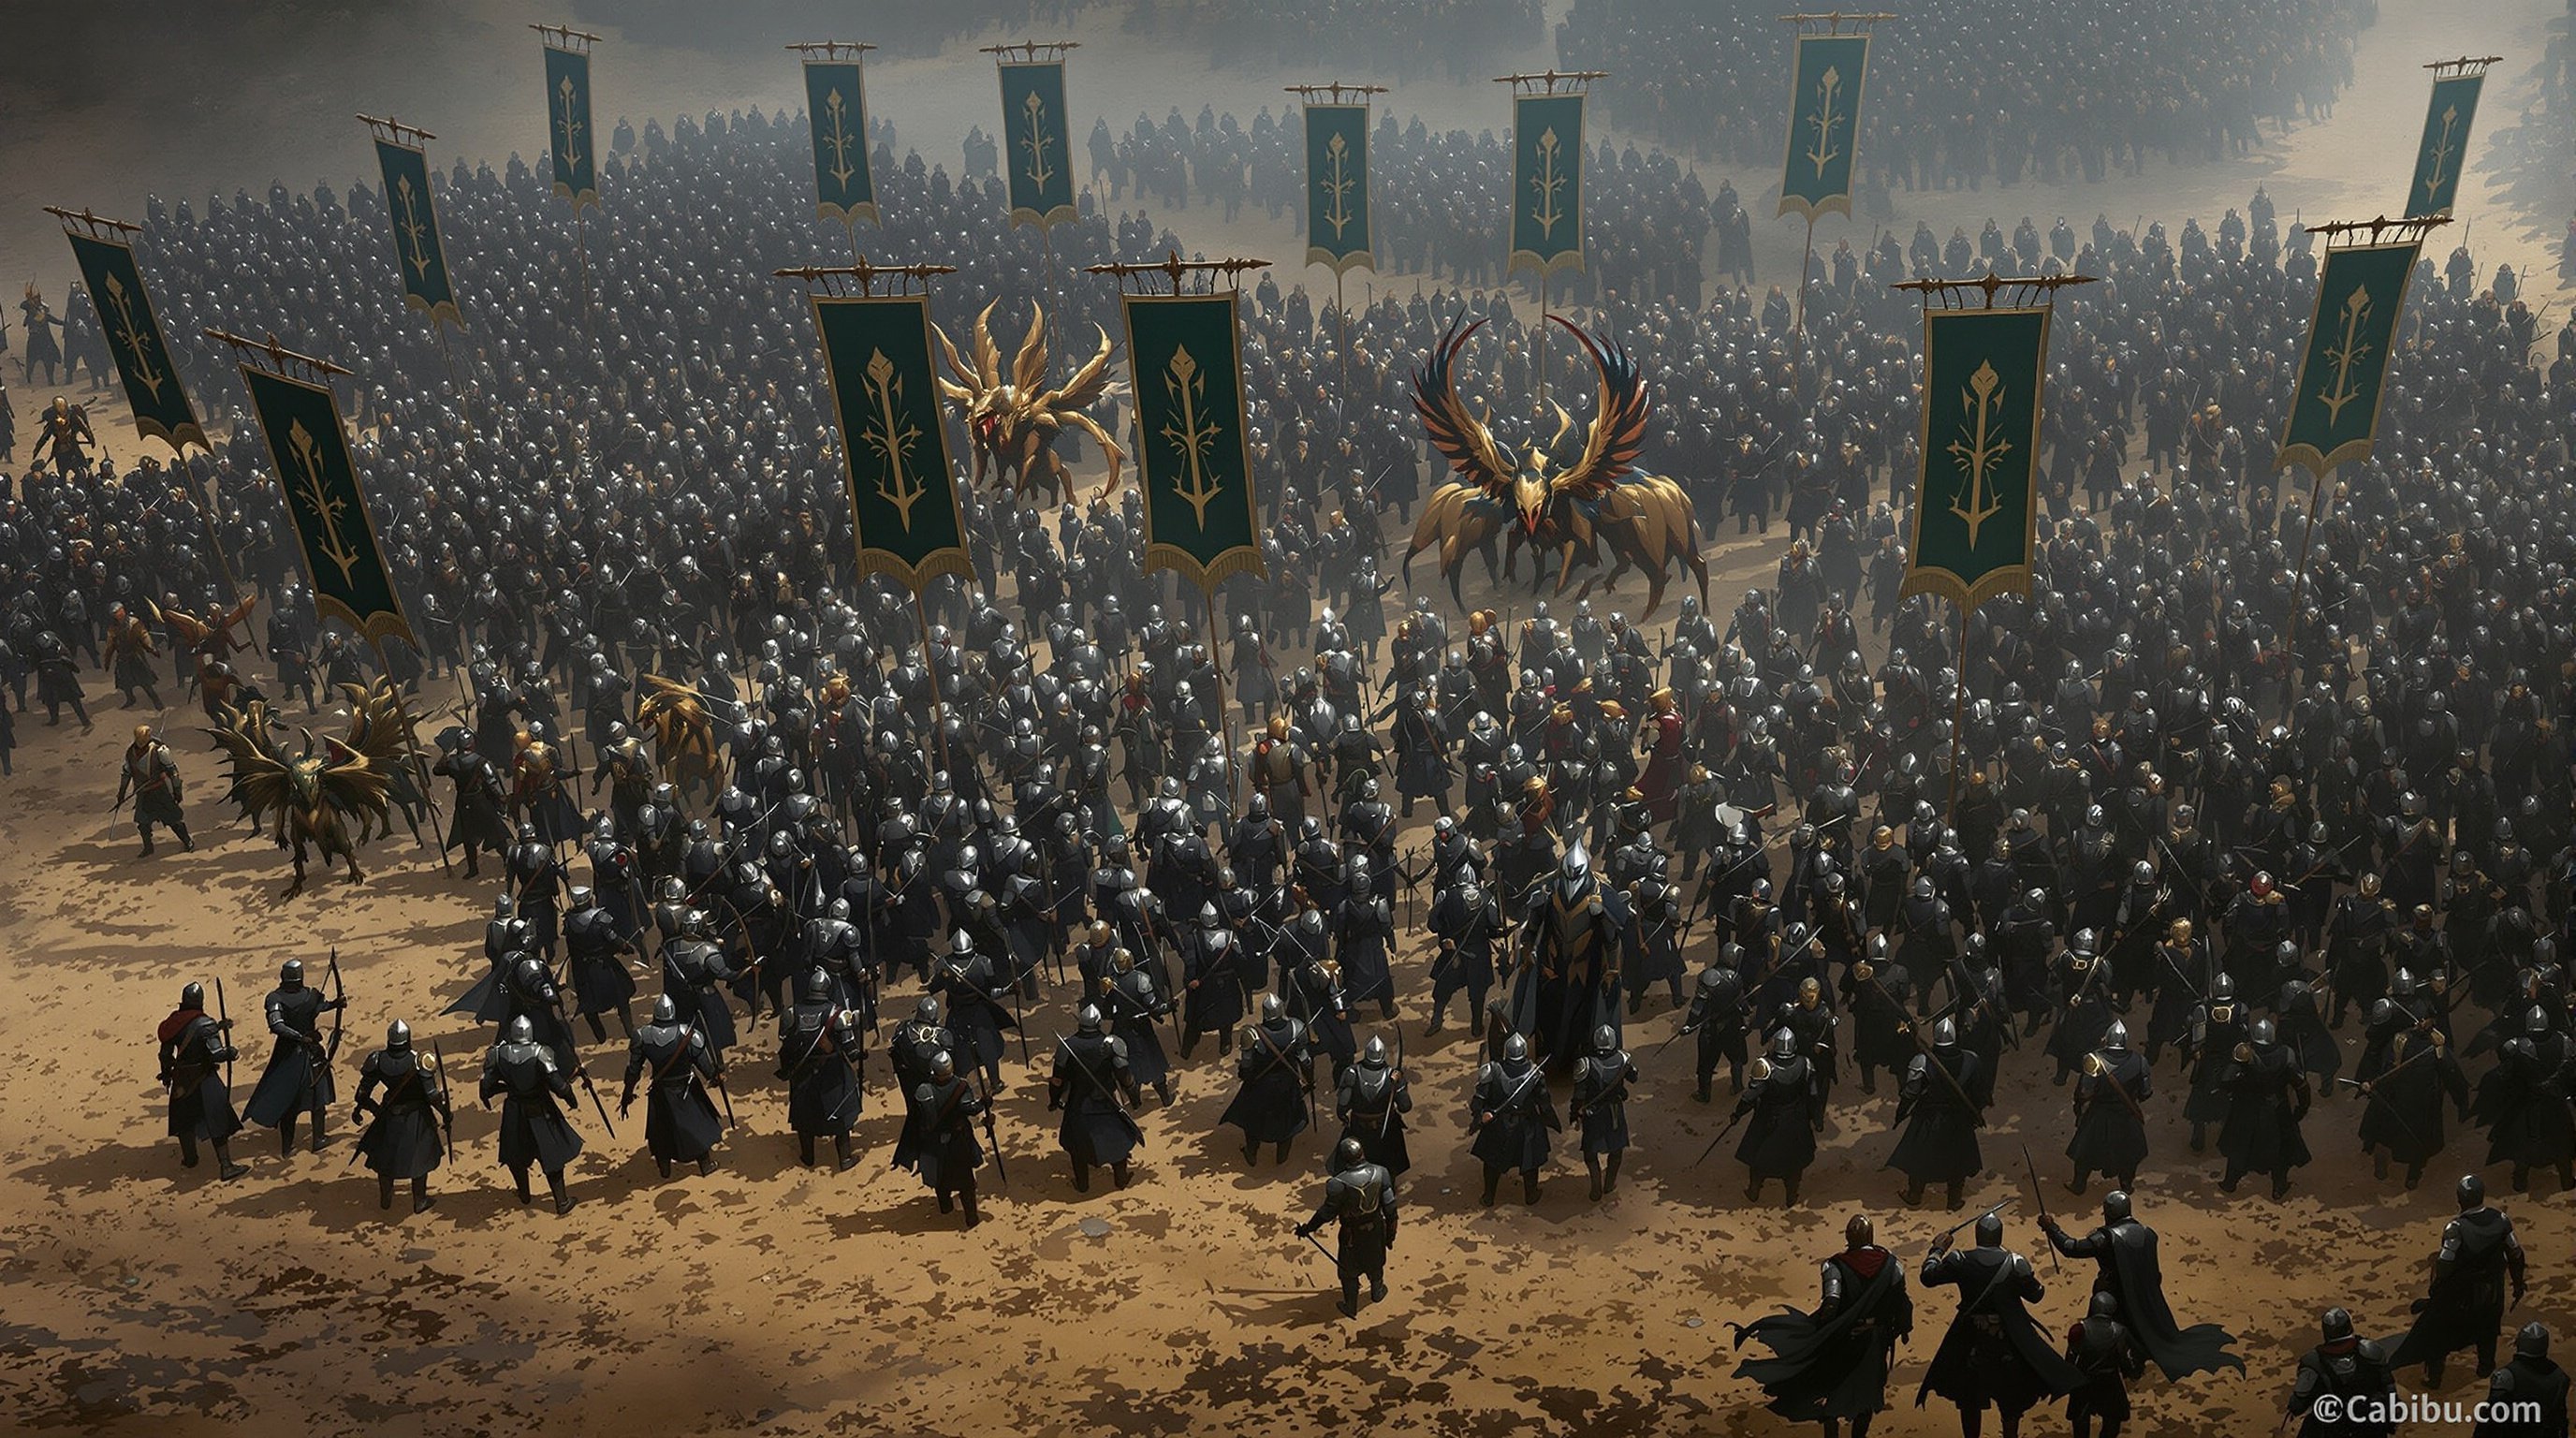
Angel
2x2Elite celestial combatant with area-denial capabilities
Orc Giant
2x3Heavy assault unit with high damage output and battlefield presence
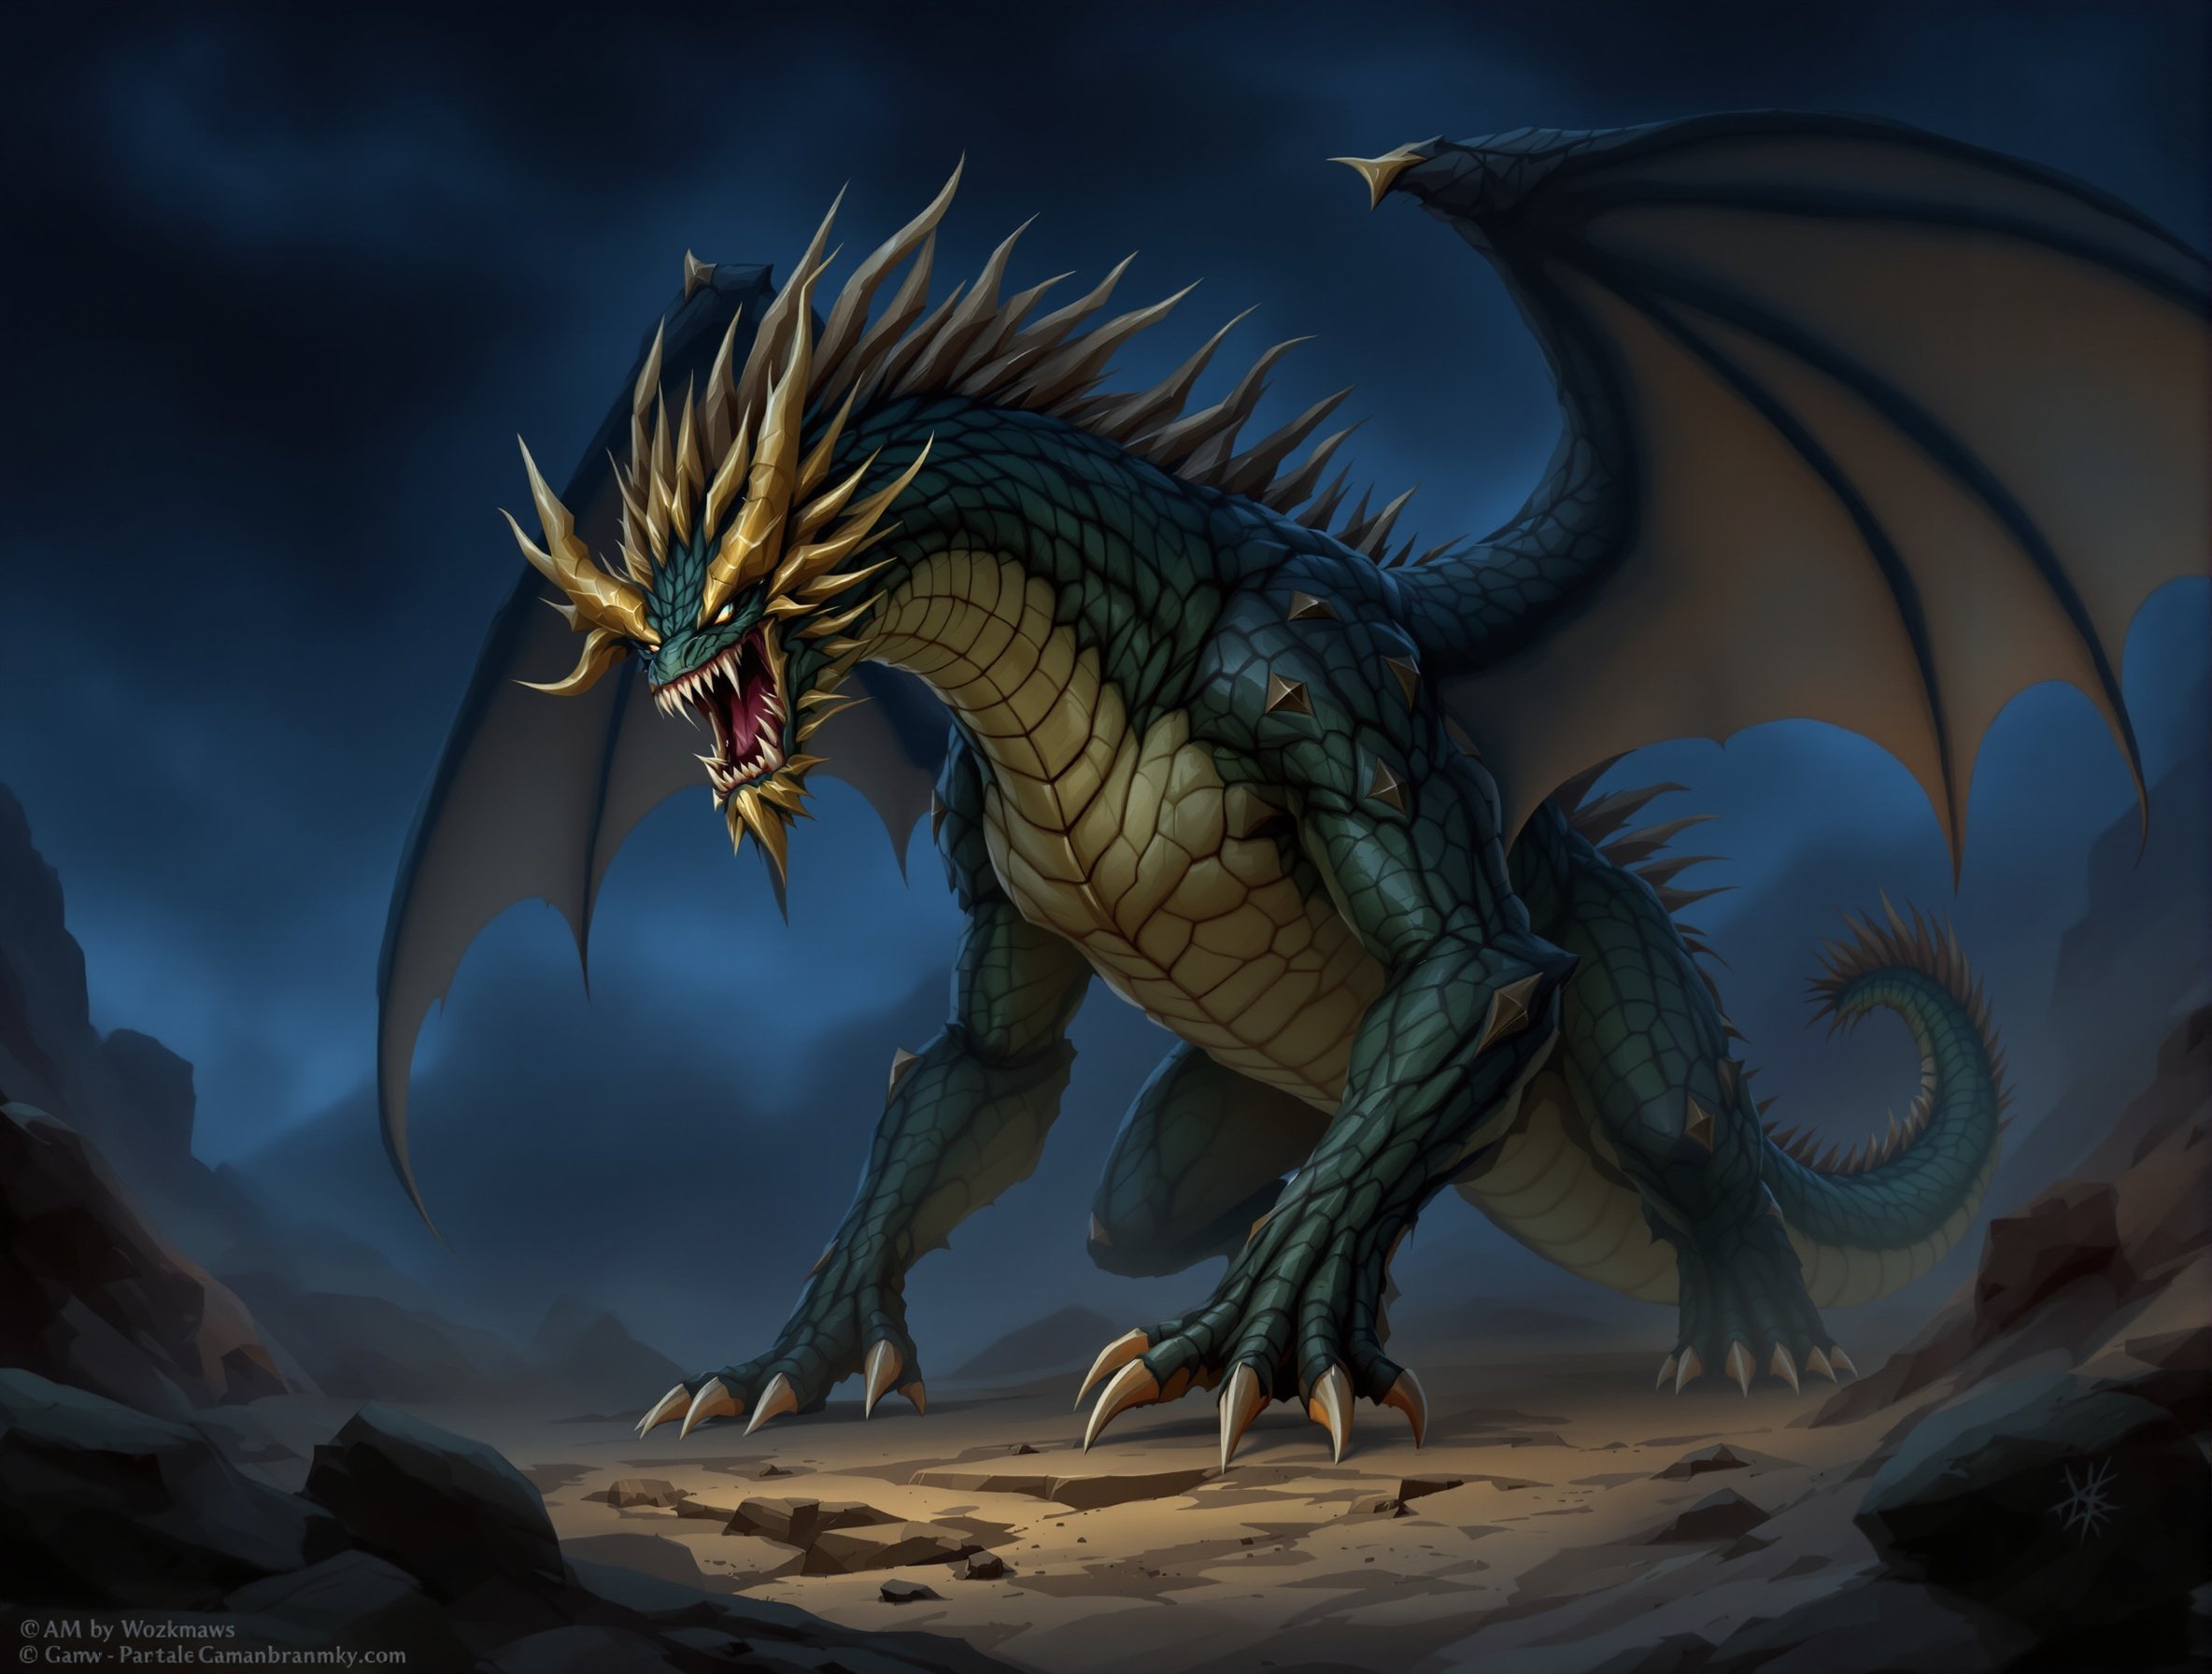
Drake (1x3)
Powerful dragon creature
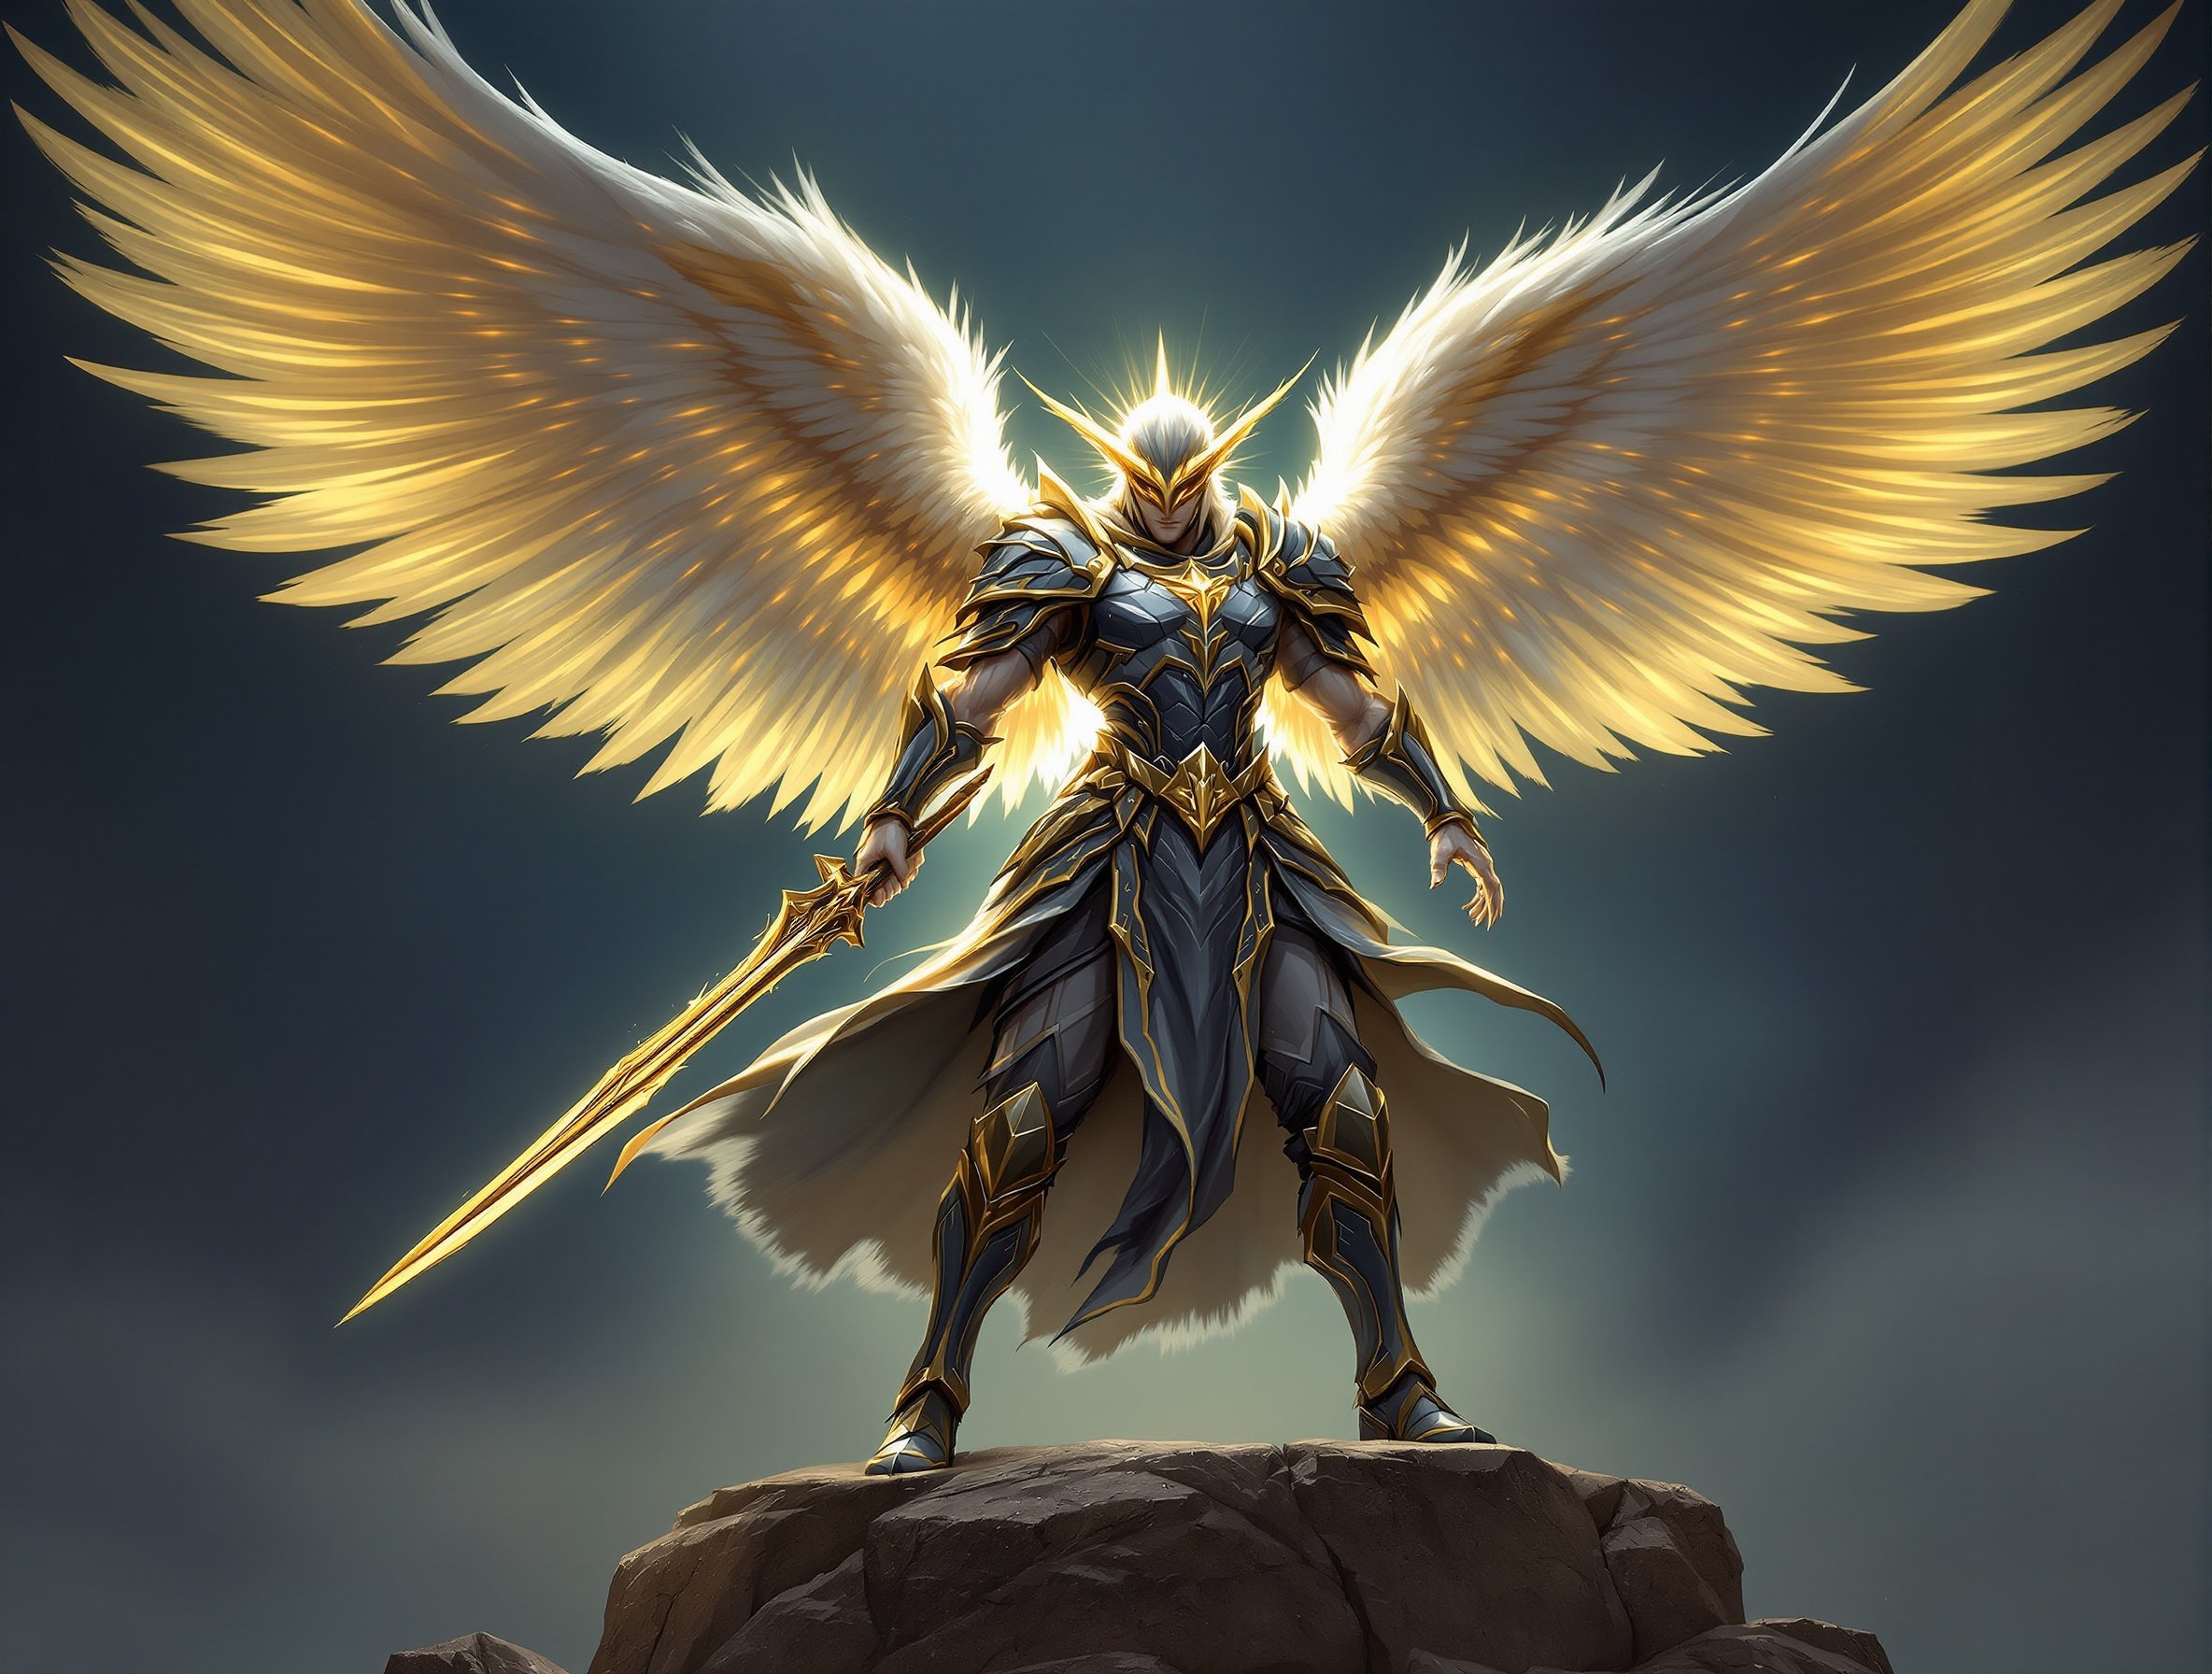
Angel (2x2)
Celestial warrior unit
Movement & Battlefield Structures
Strategic positioning is key. Units have varying movement ranges, and you can place defensive structures.
Variable Movement
Angels can move 4-6 tiles depending on buffs. Infantry typically moves 2-3 tiles per turn.
Towers
Place defensive towers that automatically attack enemies within range each turn.
Traps
Hidden traps that trigger when enemies step on them, dealing damage or applying debuffs.
Structures
Barricades, walls, and other structures that block movement and provide cover.